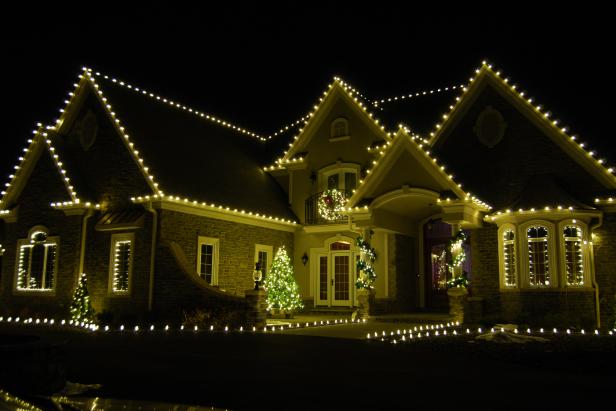
Christmas decorations are one of the most popular activities during the holiday season, and nothing is more festive than a house with lights on the roof! This article suggests organizing your Christmas lights for your roof efficiently and effectively.
- Gather Necessary Supplies
First, you’ll want to determine how many strands of lights you need for your roof. Measure the required length by walking around your house and noting each side’s total length. Once you have this number, purchase only as many strands as needed so that there will not be any excess waste or clutter created afterward. Additionally, depending on what type of roof you have (flat or slanted), other materials such as hooks and anchors may also be needed if nails are not an option for securing the lights in place.
- Measure and Mark the Roof
If you have chosen to display your Christmas lights on your home’s roof this holiday season, it is important to measure and mark the area before beginning any installation. Measuring and keeping the roof will ensure that you save time and resources by taking down or rearranging lights that are out of place.
Before tackling this task, ensure you have all necessary safety equipment, such as a ladder, gloves, a hard hat, and eye protection. You should wear shoes with non-slip soles for additional security when walking about on the roof. Once atop your roof, use a measuring tape to mark off the space you need to cover with lights. If obstacles such as chimneys or vents are located on the roof, they must be taken into consideration while making measurements.
- Install Brackets
Brackets are designed specifically for holding strings of lights on top of roofs or other high places. With sturdy metal frames that attach directly to the roof, they provide secure support for multiple strings of lights without any extra effort or time-consuming installation process. They come in various sizes and shapes, making them suitable for roofs and situations. These brackets are easily installed with basic tools such as screwdrivers, hammers, and tape measure.
With all these benefits in mind, installing brackets is ideal when dealing with hectic holiday decorations like Christmas lights on your roof!
- Layout Lights on Roof
Start by measuring the roof area that will be lit up and divide it into equal sections or triangles. Then determine how many strings of lights will fit in each section without overcrowding them. For best results, use strands of smaller bulbs, as they are easier to shape into unique patterns than larger ones. Once you have a layout created on paper, it’s time to put it into action! Remember to use long zip ties or insulated staples when attaching light strings, so they stay securely in place throughout the season.
Conclusion:
The festive holiday season is complete, and it’s time to organize those Christmas lights for the roof! With some planning and preparation, your rooftop will be lit with a brilliant display that will wow your neighbors. Decorating the roof with Christmas lights can add an extra sparkle to any home during this holiday season. Whether you opt for traditional or modern decorations or even something unique, attention to detail, such as color coordination and spacing, can make all the difference in creating a beautiful display. While there are many ways you can arrange your light fixtures on the roof, take some time to experiment before settling on one final design.